When performing augmentation with immediate implantation, follow the fundamental principles of implantology, regardless of the type of augmentation.
Preoperative Guidelines
- Thoroughly assess the patient’s health status and overall suitability for implant placement.
- Evaluate the planned implant site for anatomical, functional, and aesthetic perspectives to ensure high-quality restoration.
- During implant insertion, achieve and confirm strong primary stability within the patient’s native bone.
Indications for Immediate Implantation
Immediate implantation may be indicated in the following situations:
- Socket with four bony walls
- Socket missing a buccal or lingual wall
- Lateral augmentation or non-socket three-dimensional defects
- Defects with vertical bone loss
Protocols:
1. Immediate Implant Placement without Flap Reflection
When the socket retains all its bony walls after extraction and thorough debridement, and primary implant stability can be achieved in native bone, proceed as follows:
Step-by-Step Protocols for Immediate Implant Placement without Flap Reflection
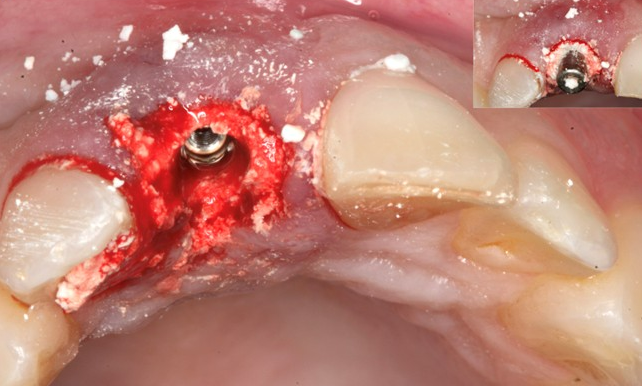
- Drill the osteotomy for the implant.
- Insert the implant and verify good primary stability.
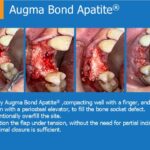
- Activate the Bond Apatite® syringe and inject the material toward the socket and implant, slightly overfilling the site.
- Immediately compact the material using a dry, sterile gauze pad. Apply firm pressure with a finger for 3 seconds, then continue compacting with a periosteal elevator over the gauze for another 3–4 seconds.
- Protect any exposed material in the cervical area with Augma Shield™, sutured in place according to the Augma Shield™ suturing protocol. Unprotected material will wash out, so proper Augma Shield™ application is essential.
2. Immediate Implant Placement with Flap Reflection
Step-by-Step Protocols for Immediate Implant Placement with Flap Reflection
- Elevate a gingival flap according to the Augma protocol (Socket Grafting with Flap Reflection).
- Drill the osteotomy, insert the implant, and confirm good primary stability in the bone.
- Activate the Bond Apatite® syringe and inject the material from the bucco-occlusal direction with slight overfill.
- Compact the material immediately by pressing a dry, sterile gauze pad simultaneously from the occlusal and buccal sides for about 3 seconds. Then compact again with a periosteal elevator over the gauze for 3–4 seconds.
- Reposition the gingival flap as is, without trying to gain tension free flap by periosteal releasing incisions Do not attempt primary closure.
- Suture the flap papilla-to-papilla, then suture the vertical incision area. Primary closure is not required.
- Protect the exposed material with Augma Shield™, secured and sutured tightly over the gums according to the protocol, to prevent washout during healing.
Lateral Augmentation or Non-Socket Three-Dimensional Defects:
Follow all general principles for immediate implantation in sockets with a missing buccal wall.
Important Note:
If implant threads remain exposed but are within a bony framework, the success rate remains high. However, if the ridge is too narrow and no bony framework exists lateral to the exposed threads, do not perform immediate implantation with simultaneous augmentation. The likelihood of achieving adequate coverage is low. In such cases, perform augmentation first, allow 5 months for healing, then re-evaluate and place the implant if conditions are favorable.
3. Immediate Implant Placement with Immediate Load
Step-by-Step Protocols for Immediate Implant Placement with Immediate Load
- Elevate a gingival flap according to the Augma protocol (Socket Grafting with Flap Reflection).
- Drill the osteotomy, insert the implant, and confirm good primary stability in the bone.
- Activate the Bond Apatite® syringe and inject the material from the bucco-occlusal direction with slight overfill.
- Compact the material immediately by pressing a dry, sterile gauze pad simultaneously from the occlusal and buccal sides for about 3 seconds. Then compact again with a periosteal elevator over the gauze for 3–4 seconds.
- Reposition the gingival flap as is, without trying to gain tension free flap by periosteal releasing incisions Do not attempt primary closure.
- Suture the flap papilla-to-papilla, then suture the vertical incision area. Primary closure is not required.
- Place the prosthesis.
Summary of Key Rules
- Clean the socket thoroughly after extraction.
- Drill and insert the implant, verifying strong primary stability in the patient’s bone.
- Activate and inject Bond Apatite® toward the implant and socket. Overfill above the implant head—do not attempt to force the material to the socket’s bottom. Focus compaction in the cervical area, ensuring complete coverage of the implant head.
- Do not attempt primary soft tissue closure. The material can remain exposed if protected by a properly sutured Augma Shield™.
Defects with Vertical Bone Loss:
Do not perform immediate implantation with simultaneous augmentation in cases of vertical bone loss, as success rates are very low.
Expert Tips:
If the material becomes unstable during compaction or suturing due to blood or saliva, place a dry gauze pad over it and apply firm pressure for one second before continuing. After initial compaction with the finger and periosteal elevator, the material does not need to harden completely before suturing. It only needs to be well compacted, which can be easily maintained by briefly compacting again with gauze whenever necessary.